
Overview
One of the most common problems a digital marketing agency faces is incorrectly setup Google Analytics Accounts. As the software platform has aged, the menu and management structures have become extremely complex, making proper setup more vital to site performance. Improper setup can lead to traffic losses, missing keyword reporting, and other negative ranking characteristics. Below are the steps our agency uses for setting up Google Analytics properly.
Step 1.
The first step when setting up Google Analytics is Business Account Creation. You can access this setup/login screen from the link google.com/analytics. As of October of 2019, this is the latest screenshot of Google’s site’s interface:

Step 2.
Once you are logged in, depending on your property permissions (you either have access to one property, or multiple properties) you will then see the Google Analytics Overview Page.
If you do not have any existing properties, you will be taken to the website Property Setup Page within the Google Analytics Admin Menu. This menu system is designed with experienced users in mind, so it can be difficult to navigate without some Google Analytics platform knowledge.
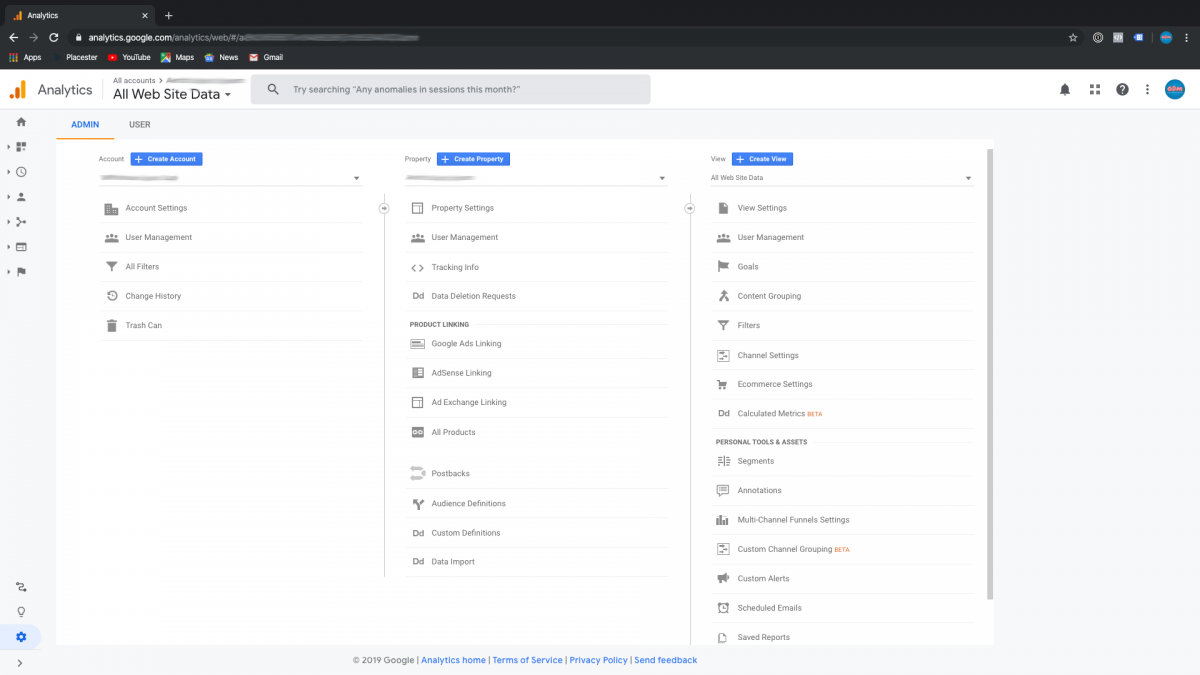
The basic Structure breaks down into three components: The Account Level Access, The Property Level Access, and the actual Website Data Access.
Account Level Access
The first column on the left list is the Account Level Access Menu. These options relate to users that have access to but don’t own your business’s Google Analytics Account. Similar to domain names, this information is vital to the long term success of your business, and you need to verify your ownership of the Account level property.
Property Level Access
The rest of this guide will explain how to use the Property Level Access Tools within Google Analytics, but for this section we will summarize. This column in the middle of the above is where you configure your specific Google Analytics Properties. This can be one website (if your a local small business and have 1 website) or several (100’s of properties if you are a full scale agency) and helps to keep coherent track of all the tracking scripts and Google Product Linking information.
Website Data Access
More of the advanced user features are included in the website data access filters. You can create data experiments, view certain types of users, manage your audience lists, and other complex features that require more controls of the specific Google Analytics Property. This is also where you enable more enhanced Google features such as E-Commerce tracking, Search Reporting, and Google Analytics Goals.
Step 3.
Property Settings
Initially, when you first open the Google Analytics Account (or property) the software defaults to the Property Settings Page. This page is where you name the property, setup the correct URL Expression, and Connect Google Analytics to Google Search Console.
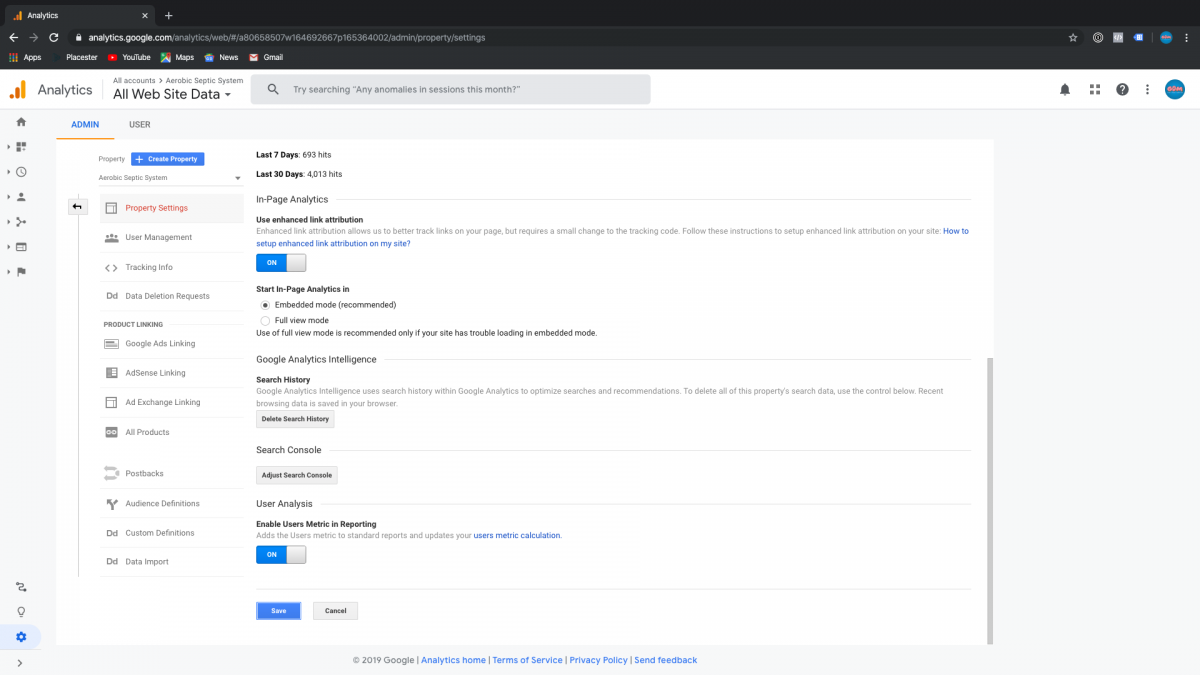
When you press ‘save’ for the information, that then processes the new property, and forwards you to the Tracking Info Tracking Code Installation page.
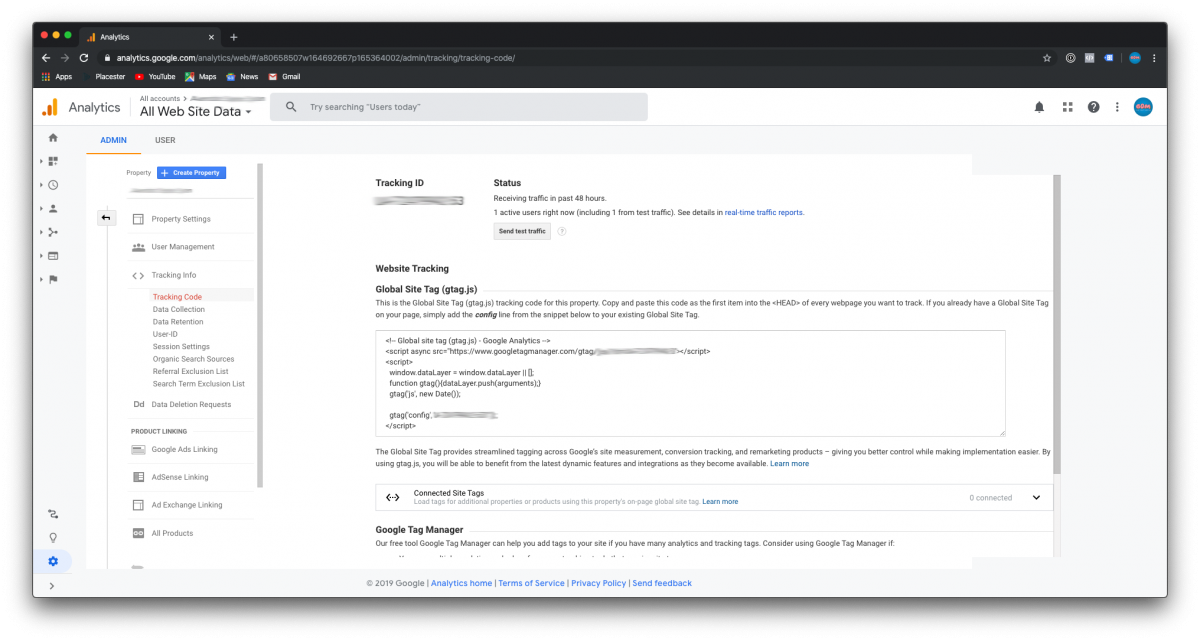
At this point in the software setup, you will need to copy this tracking code into the Asynchronous Header section of your website. If you are unfamiliar with your websites internal functions, make sure and email this information to your developer for properties installation.
Tracking Code Testing
After the script is installed on your website, we need to test the connection to Google Analytics. The testing tool is conveniently located on the Tracking Code Installation Page. After clicking the Send Test Traffic Button and refreshing the page, you will see the verification of your visit to the website. Alternatively, you can visit the website in another browser, then visit the Realtime tab on your analytics account. In this section, you will see yourself on the report, with your related user information.
Key Performance Tweaks
Once you have verified the traffic from your website is reporting properly to Google Analytics, there are a few features you want to enable within the Google Analytics interface.
1. Demographics and Interests Reports
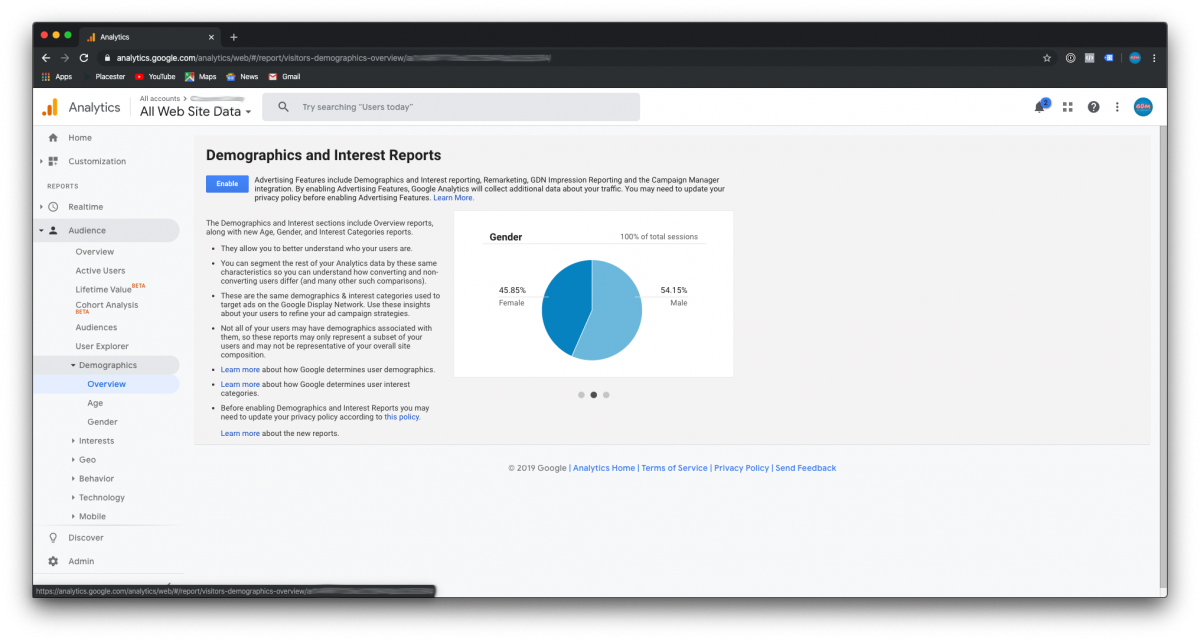
From the Google Analytics Overview (or using the navigation menu on the left-most portion of the screen) navigate to the Audience Overview Page by clicking the Audience Heading. Under the Audience Heading, navigate to Demographics. This will pull up the below screen, that needs some extra permissions to track the information about your site’s users. Once enabled, this report gives you more insights into your user’s age groups, geographical locations, and other user related metrics.
2. Enable Organic Keyword Reporting
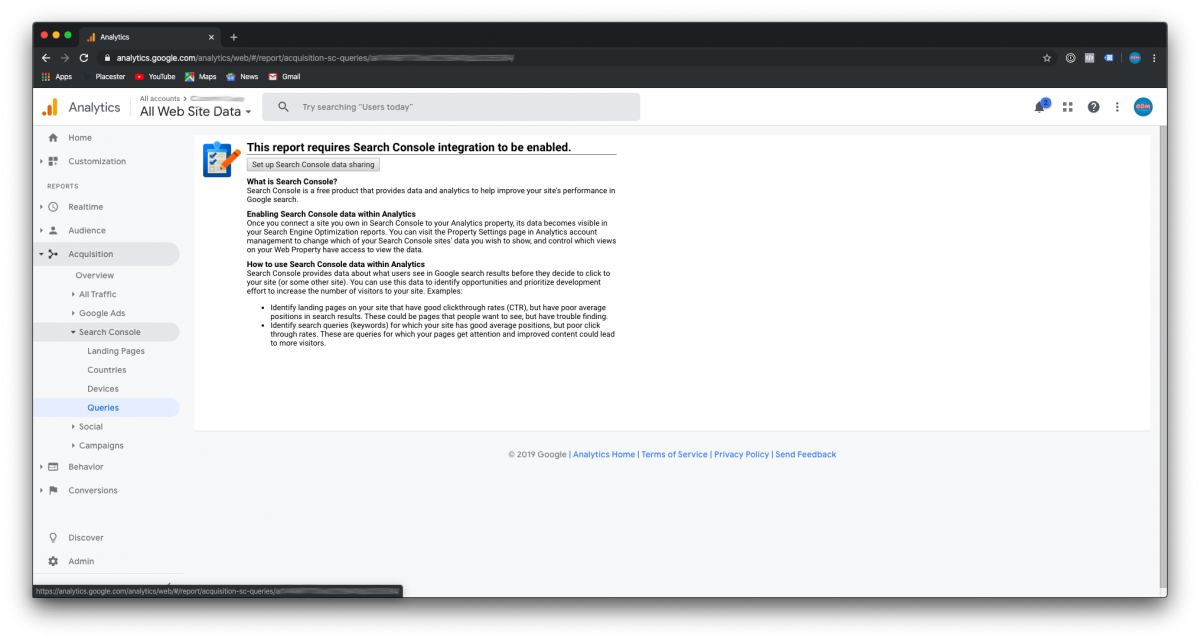
Vital to any internet marketing strategy, properly linking Google Analytics to Google Search console enables the processing of your organic ranking keywords through both properties. This allows you to check your search queries rankings, impressions, landing pages, and other organically related traffic metrics. You can learn more about this process in our article about linking Google Analytics and Google Search Console.
3. Enhanced Conversion Reporting
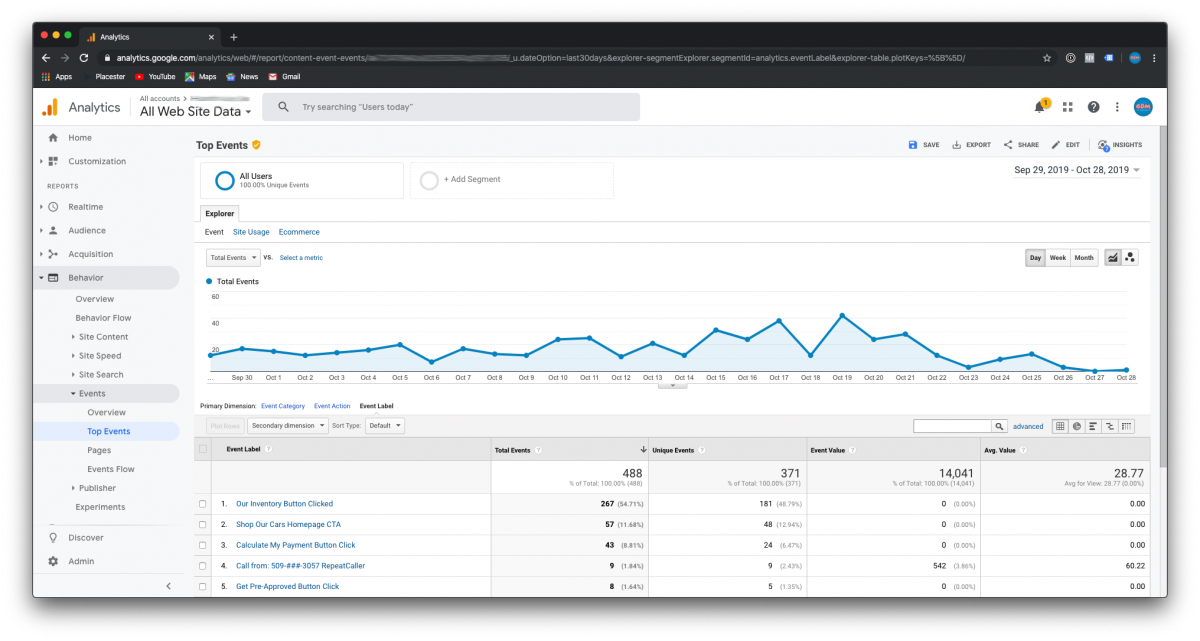
The largest focus of our agency for the past several years, conversion tracking allows you to use your own metrics within the Google Analytics system. These conversions flow throughout all of Google’s properties, allowing more efficient lead tracking across their advertising platforms. If you are planning on using Google Ads, or tracking audiences, you will benefit greatly from Conversion Tracking reporting.
4. E-Commerce Tracking Setup
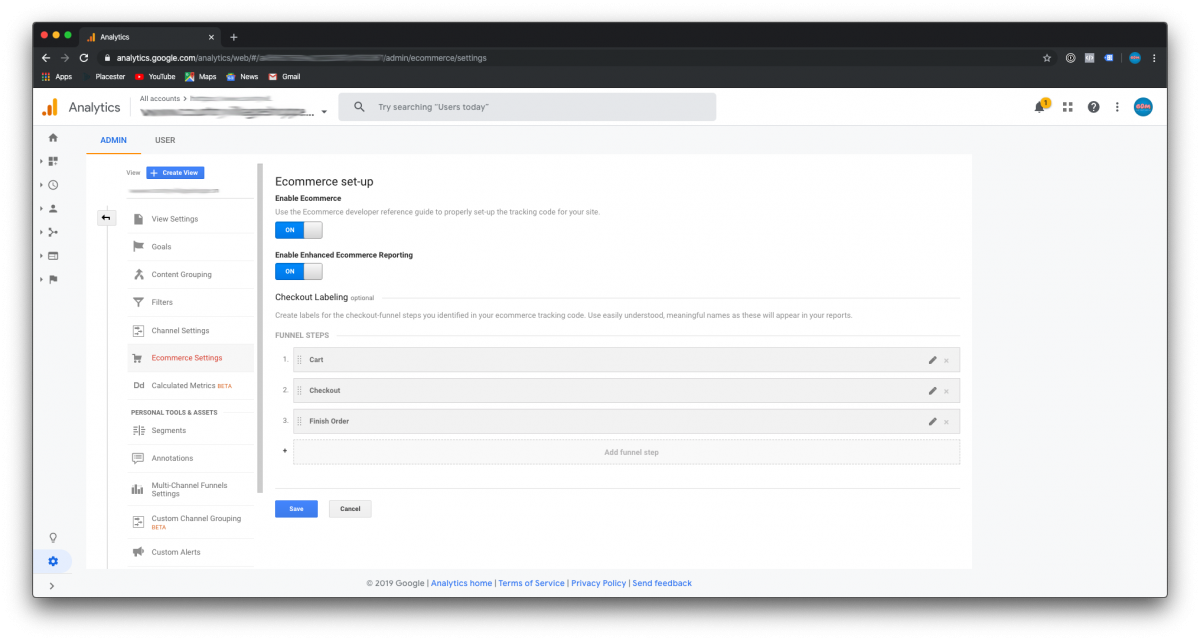
Applicable only to E-Commerce stores, E-Commerce Tracking enables Google’s Revenue Reporting and is one of the requirements for Google Ads to function properly. After updating the tracking code on your website (this step is explained on our guide for E-Commerce Tracking Code Setup) you then label your e-commerce conversion funnel process, and this flows your sales data into the E-Commerce reporting section of Google Analytics.
Step. 4
Troubleshooting
If any of the above steps doesn’t work for your specific needs, or you are unable to get certain functions working, Google offers help support via live chat, email, or phone service. These services are accessed by clicking the Question Mark in the upper right corner of the screen. Problems can often include traffic not reporting, malformed or incorrectly installed tracking codes, and disconnected Google Properties.
Thats It!
This concludes our Google Analytics setup article! If you have other questions or would like some help with your Google Products, please reach out to the Donut Team!